This is the first post in a series about setting up a home food photography studio. I’ll be talking about gear and lighting for your home studio in upcoming posts.
During this time of the Covid-19 pandemic, a home studio is key for food photographers, due to the limited ability to gather for shoots. I’ll also be talking more about this later in the post.
First, let’s take a look at what props you need for a photography studio and the various kinds of backgrounds you can use–both purchased and DIY.

The Most Useful Food Photography Props
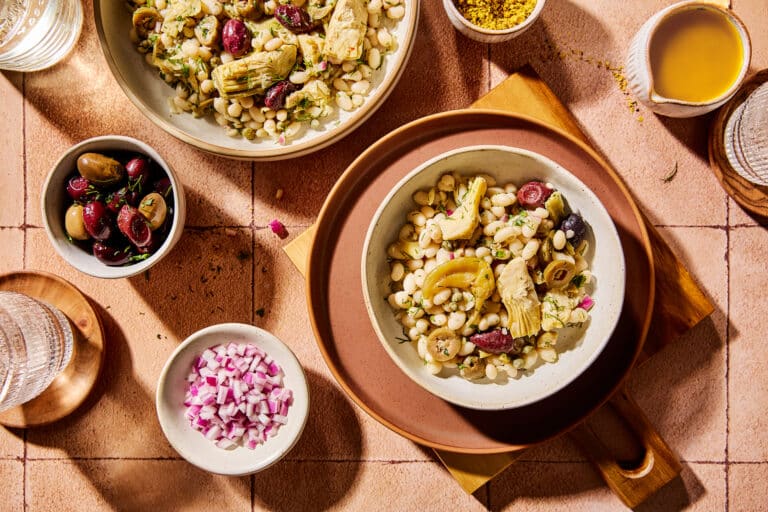
Here’s the thing about food photography props: no matter how many you have, it’s never enough. You’ll get a client brief and despite your bulging prop closet, you’ll realize that you don’t have a small enough neutral stoneware bowl, or a gold-finish fork that would be the perfect utensil to tell the story of your food. No matter how large your inventory, there is always something missing.
Props are such an integral part of an image that prop styling is something that people do as a full-time career. Big shoots often have a budget for a prop stylist, who works along with the food photographer and food stylist. They have a huge collection of props and surfaces, and it’s their job to shop for the exact props that are required to execute the client’s vision and requirements of the brief.
However, if you’re a content creator, brand photographer, or otherwise working in a home studio, you’ll likely not need the wide range of props that a commercial prop stylist requires, and will not have the room for them, anyway.
There are some props that I recommend everyone has in their inventory and these are:
– matte, stoneware in neutral colours
– a set of plain white dishes
– a mix of vintage and modern glassware and cutlery
– ceramic serving bowls in neutral colours
– natural linen napkins and tablecloths
If you would like a complete list of the props I recommend, you can sign up for my newsletter in the button below and receive my FREE prop checklist and food styling guide.

Tips for Buying Food Photography Props
Your collection of props should include modern and vintage choices. Whatever your personal photography style, you’ll need both. Vintage choices are perfect if you’re style is more rustic, but they can also be a single, eclectic accompaniment to more modern props. This is an approach you see done very well in Donna Hay’s books and now retired magazine. I personally love to add interest to a photo with a vintage spoon next to a more ceramic item. They also offer the added benefit of a patina, which will lessen the need to manage pesky reflections.

When purchasing glassware, the bulk of your collection may be weighted to the vintage side, as it tends to be smaller. Scale is very important in food photography, so smaller props are almost always better. That way you can make sure that they are not going to dwarf your subject and take the attention away from the star of the show–which should always be the food.
Salad plates are usually preferable to dinner plates, which are generally too big unless you’re portraying a main course accompanied by sides, like a steak with mashed potatoes and vegetables. When shooting overhead, even small pinch bowls can look huge because the overhead angle flattens depth, so also keep this in mind of you shoot a lot of flatlays.
When purchasing dishes such as salad plates, soup bowls, cups etc, I recommend purchasing three of each. This will allow to create tablescapes and more complex compositions using the rule-of-odds. You’re likely not to need more, but having three of any given item will ensure that you always have enough of the same prop for your food photography compositions.

Making Food Photography Backgrounds
Making your own food photography is a cost effective way for you to expand your background selections for your food photography home studio, and there is no limit to your creativity. The sky is the limit.
My most common materials for creating my own backgrounds are painter’s canvas and thin sheets of plywood from the hardware store. These are lightweight and easy to store. In the case of the canvas, you can just roll then up and put them in the closet.
To paint plywood and canvas, I suggest purchasing samples of paint pots from the hardware stores as well. These are usually just a few dollars and there is an incredible array of colours to choose from. For any given surface, choose three or four colours that are close in tone. A single colour can end up looking too flat, while several colours stippled onto plywood with a sea sponge or rolled together on canvas tends to look more dynamic. Just make sure you don’t create so much texture that your background won’t end up overpowering the food.
In the case of painting canvas, be sure to use a primer, as the canvas soaks up a ton of paint.
If you want to read more about DIY backgrounds for food photography, then be sure to check out this post.

Buying Food Photography Backgrounds
Purchasing food photography backgrounds can be expensive but worthwhile, as some of the qualities and finishes or purchased or custom made backgrounds are difficult to do on your own. Some of my favourite backgrounds can be found in the Stone collection offered by Woodville Workshop. Although I make a lot of my own painted backgrounds, no matter how hard I tried I couldn’t seem to replicate the exact look I was going for. Now the four backgrounds I have purchased through them are the most used in my photography and well worth the higher price point.
You should have a few backgrounds that are water and stain resistant, such as vinyl backgrounds or those offered by Bessie Bakes. The latter are thin, pliable backgrounds that tend to look more realistic than vinyl, but are easy to transport and store. I have this one and this one.
When it comes to vinyl backgrounds, there are many options, all with varying degrees of quality. My favourite are those from Capture By Lucy, especially their Latte Marble, a warm marble replica that can be found all over Instagram due to its popularity.
A couple of tips to be wary of when it comes to vinyl backgrounds: the dark ones can be difficult to use with flash, because of the glare. Also, they tend to work best with flatlays for this reason. In addition they are wipeable and stain resistant, which makes them a must-have for your collection if you shoot drinks, but you should still be careful about highly coloured items such as beets or beet juice sitting very long on the surface.

Do You Even Need A Home Studio?
A home studio can be a valuable asset, particularly during this time of global pandemic. As a food photographer, you’re perfectly positioned to find work, whereas your fellow boudoir, wedding and portrait photographers are highly challenged.
Food is everywhere, and food and food products can come to you. You don’t need much space shoot, so even if you don’t have a dedicated room to shoot in, you can get by with not much more than your kitchen table.
Even before the pandemic, many food photographers shot in their home studios and then delivered the files to the client. In my case, I have shot several images for food packaging at home when the client didn’t have the budget for a studio rental and food stylist.
In this kind of situation, the clients cannot expect the same creative control, so make sure that this is spelled out for them in the terms and conditions. You want to avoid reshoots and having to sit around waiting for them to approve images before your tear down your set to go on to the next image.
In Conclusion
The ability to shoot at home is one of the things that set you apart as a food photographer, but you need to have the right set-up to succeed. Hopefully this advice about propping will help you make sure that you have the right props and backgrounds for your home studio without having to break the bank.
In my eight-week Accelerator food photography mentorship program, I coach food photographers on how to find clients and market their work during these challenging times. If you’re interested finding out how you can succeed as a photographer during these challenging times, be sure to contact me via the contact form on my About Me page.

* Please note that this post contains Amazon Affiliate links. If you make a purchase from these links, I will receive a small commission at no extra cost to you.