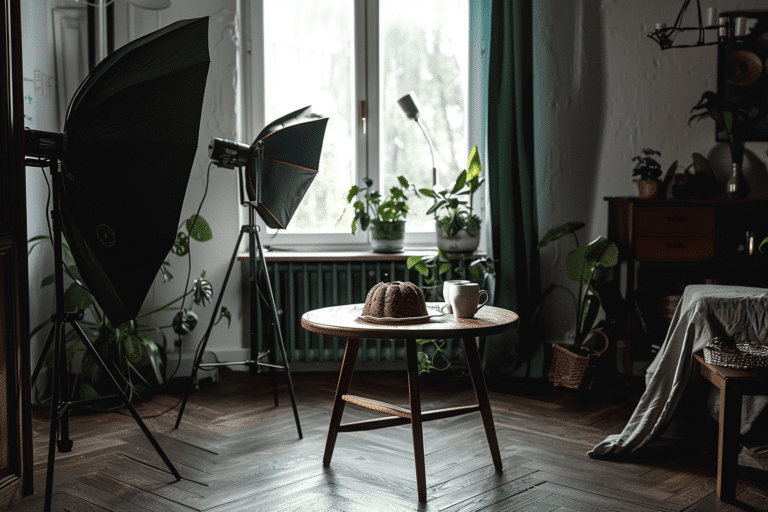
How to Create Natural-Looking Sunny Light with Two Strobes

This two-light setup is one I reach for often when I want to mimic clean, directional daylight in the studio—especially for food scenes that feel fresh, bright, and sun-kissed, without relying on unpredictable natural light.
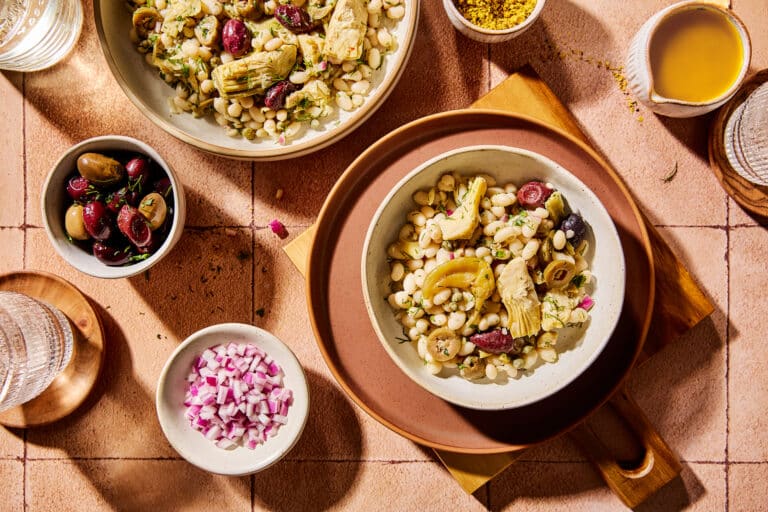
I used it to photograph a Mediterranean bean salad. The result: crisp highlights, soft but sculpted shadows, and an overall sunny mood that feels like it belongs on a tiled terrace at golden hour.
Let’s break down exactly how it was done.
The Gear and Modifiers
✅ One strobe with barn doors (key light)
✅ One strobe with a reflector + 30° honeycomb grid (fill light / shadow control)
✅ Two white bounce cards for subtle fill in the foreground
The goal was to create contrast and dimensionality while keeping the scene soft enough to feel natural. This combination gives you the shape and punch of hard light, but with total control over how much falls off into shadow.

Light Placement and Orientation
To help you visualize this two-light setup, imagine the face of a clock:
🕒 Camera is at 6:00
🕐 Key light (barn doors) at 11:00
🕑 Fill light (reflector + grid) at 12:00
Both lights are on the same side of the set, positioned fairly close together but with subtle differences in height and direction:
- The key light sits higher, angled downward and across the scene to cast clean, directional shadows. This strobe does most of the heavy lifting in terms of sculpting the food and mimicking a window-style sunbeam.
- The fill light is placed slightly lower, angled more gently toward the scene. The honeycomb grid keeps it focused and tight. It doesn’t flatten the contrast but brings back just enough detail in the deepest shadows to maintain a polished, editorial feel.
The offset between the two strobes in terms of angle and elevation is essential to obtaining the quality of the shadow depth.
To achieve this style of lighting, you want enough overlap to lift shadows, but not so much that you erase the beautiful sculpting you created with the key light.

Why Barn Doors and a Grid?
Barn doors are especially useful here because they allow you to control the shape and direction of the light beam with precision. Without them, hard light can spill into areas you don’t want overly lit, like your background, table edges, any reflective props, or white linens.
By flagging the light, barn doors help you keep contrast where you want it.
The honeycomb grid on the second light serves a slightly different function: it narrows the beam to prevent it from washing over the entire scene. This gives you localized control and helps maintain dimensionality.
Think of it as strategic shadow shaping, not traditional fill.
The Importance of Height
The elevated position of the lights is what gives this setup its sunny, natural-light quality. Light coming from overhead feels familiar, like a high afternoon sun, and helps replicate the type of highlights and shadows you’d get shooting near a bright window.
Too low, and the light starts to feel artificial or harsh. Too high, and you risk the loss of texture that is so essential to great food photography.
Bounce Cards for Gentle Fill

You’ll want to experiment here based on your subject, but generally, keeping the key light well above eye level gives you that clean, crisp falloff across plates, bowls, and textured surfaces.
Because this setup creates strong shadows—especially with deeper plates and layered elements like beans, herbs, and oil drizzles—adding bounce cards is essential.
I placed two white bounce cards off-camera, both to the right of the camera, opposite the key light. These helped reflect just enough light back into the scene to soften up shadow pockets and avoid that underexposed look that sometimes happens when you use hard light without compensation.
The key is subtlety. You’re not trying to flatten your shadows, just open them up enough so the food still looks inviting and well-lit, especially when viewed in print or online.
When to Use This Setup
This two-light configuration is ideal when you’re aiming for a natural daylight look with more control than sunlight offers. It’s particularly well-suited for:
- Fresh, bright recipes like salads, grain bowls, or citrusy seafood dishes
- Editorial or cookbook-style imagery that needs depth but not too much drama
- Studio sessions where natural light isn’t available or reliable
It works beautifully for Mediterranean or coastal-inspired food scenes, where the light should feel airy, clean, and slightly warm—but never flat.
Final Adjustments and Tips
Once the lights are positioned, fine-tuning is where the magic happens.
Here are a few things to keep in mind:
✔️ Tilt the key light down, finessing it according to how deep you want your shadows.
✔️ Bring the fill light closer to soften shadows further, or pull it back if it’s killing contrast.
✔️ Adjust barn doors to shape the light beam exactly where you want it. Watch your backgrounds and reflective surfaces carefully.
✔️ Use bounce cards for a bit of extra fill where it’s need.

Summary
This setup strikes the balance between editorial polish and natural warmth, a clean, versatile solution when you want to recreate Mediterranean sunlight in the studio.
To recap:
- Key Light: Strobe with barn doors at 11:00, positioned high
- Fill Light: Strobe with reflector + grid at 12:00, a bit lower and angled differently
- Bounce Cards: For subtle lift in the shadows
- Result: Sculpted contrast, soft sunny feel, dimensionality without harshness
Want More Education About Natural Light?

If you’re new to working with strobes or want a stronger foundation in artificial lighting, my LightShaping eBook is the perfect place to start. It’s a comprehensive primer designed specifically for food photographers who want to understand how artificial light works, how to shape it with modifiers, and how to start using strobes with confidence—without the fluff or overwhelm. Learn more here: LightShaping eBook →